Have you ever needed numbered tickets for a raffle, as entry tickets, vouchers, inventory or any other use? With this online ticket printer you can now generate PDF with the design of your own personal tickets readily laid out for printing.
First published: 03/02/2021 | Last update: 04/02/2021
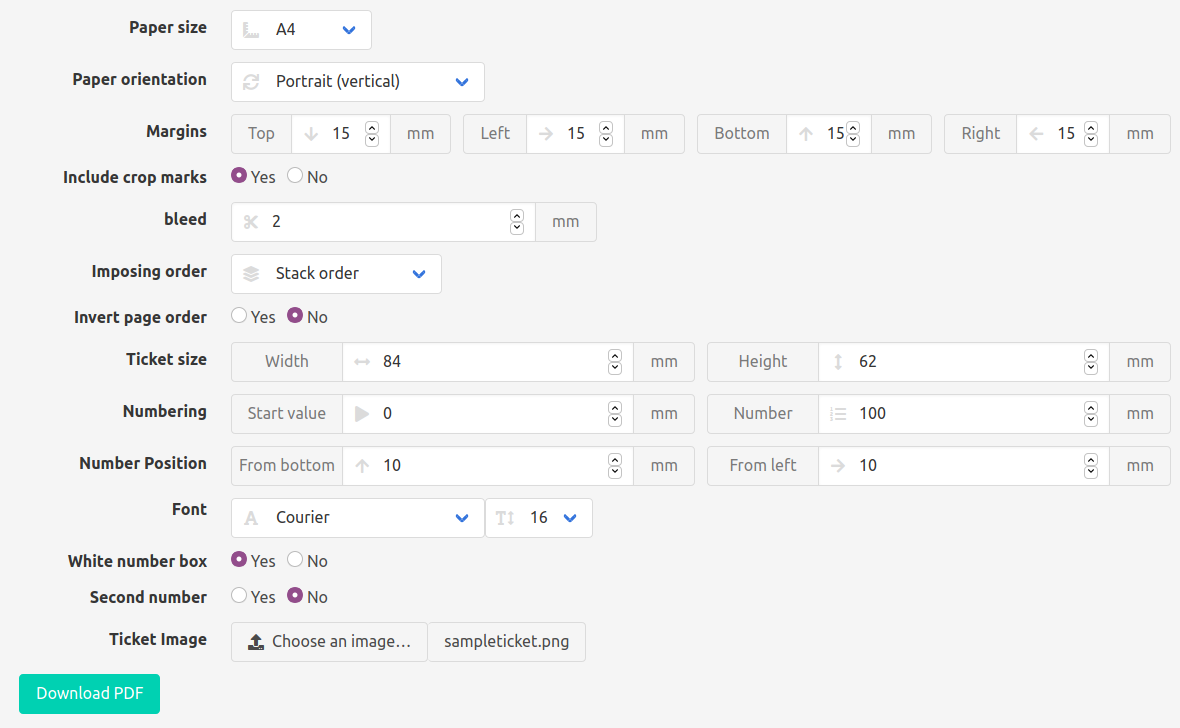
The online app offers quite a few options which require some explanations for those who are not too familiar with professional printing.
To go to the app click here. And if you want to give it a try you can download a sample background ticket here and use it for playing around with the app.
Paper size
The dropdown menu offers the most widely used page sizes which are
- A4,
- A3,
- letter,
- legal.
However, you are not limited to these sizes. If you want to lay out your tickets on a different paper size you just need to choose "other" and an additional line of fields will show up where you can introduce paper width and height in mm.

Paper orientation
Depending on the dimensions of the ticket in some cases you will be able to fit more tickets into every page in vertical orientation, in other cases in oriental orientation.
Take into account that the selection of the drop-down prevails over the width and height settings in case you specify values for a personalized paper size.
Margins
These are the non-printable areas, these settings depend on your printer model.
Include crop marks
Crop marks are black lines at each side of the paper which indicate where to cut. Having crop marks makes cutting out the tickets a lot easier.
Bleed
If you just want to have a mark between the different tickets you need to set this to "0". On a white or uniformly colored background this is ok. However, if your ticket design plays with patterns, fading colors or has fotos or pictures in the background, getting a good result with just a single cut will not be possible. In this case you will need to set bleeds to at least 2mm. This means that, instead of trying to separate the tickets with a single cut, you cut through the tickets close to the borders which means you will need two cuts between each row or column of tickets.
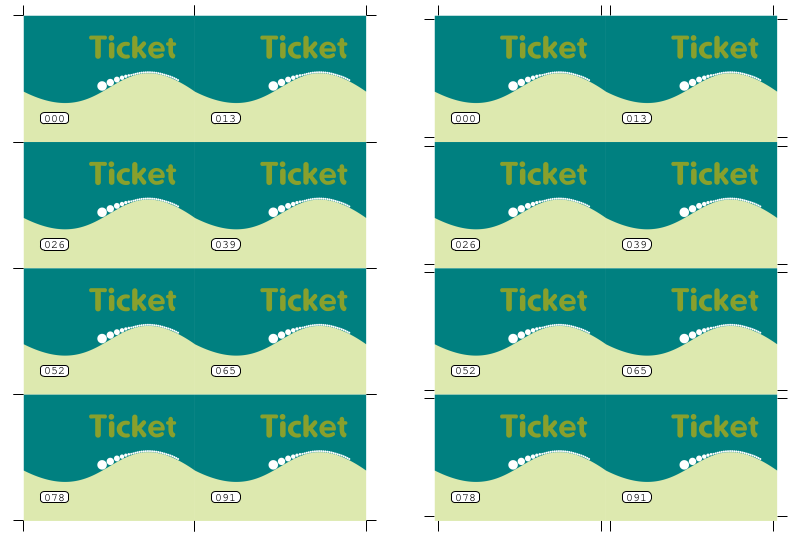
In the above image on the left bleed is set to 0 while on the right bleed is set to 2 mm.
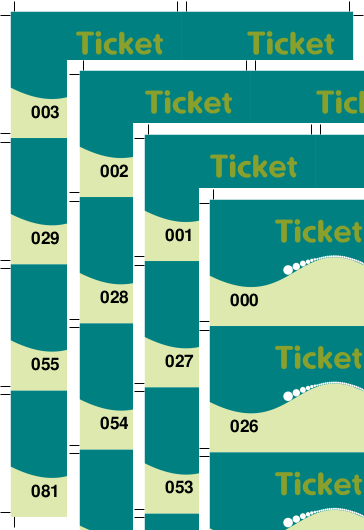
Imposing order
There are three possible settings:
- Stack order
- Sequential order
- Random order
Which to use depends on your printer, your cutting device and the use you want to give to your tickets.
Stack order
If you have a guillotine with which you can cut the whole pile of paper at once you will want to use stack order. You will end up with a series of ticket piles which will already be in the correct order.
Sequential order
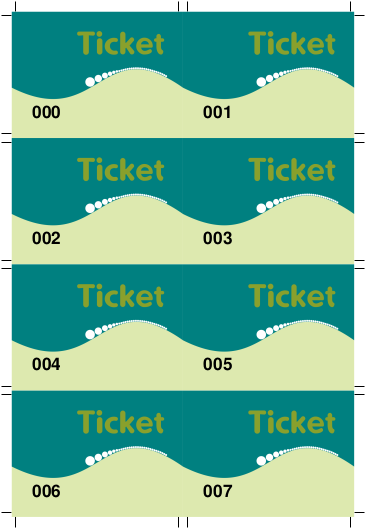
If you print a limited number of tickets and all you have at hand are scissors or a paper cutter which means you can only cut one paper at a time then printing the numbers sequentially is what you want.
Random order
If you want to make raffle tickets and you want to make sure that all ticket numbers are really mixed up this is the way to go.
Invert page order
Most printers will deposit the printed paper one on top of the other in the tray which means you and up having the pile of paper in reverse order. For this reason you will probably want to invert the paper order in your PDF document so you end up with a pile of paper in the correct order.
Up to this point all settings act on the paper you print on, now we get to the settings that actually refer to the tickets.
Ticket size
This is where you introduce width and height of your ticket in mm.
Numbering
Two values control the numbering. Start value defines with which value the numbering is started. Usually you will set this to "'0" or to "1". However, if you need a lot of tickets, i.e. more then 1.000, you don't want to generate them in one single PDF file. In this case you can generate a first file which goes from 0 to 999, then another one from 1000 to 1999, etc.
Number refers to the number of tickets you want to generate.
Number position
The position of the number is specified in mm from the bottom left corner of the ticket and refers to the bottom left corner of the number. Important: This does not include the optional white box in which the counter is printed.
Font
For setting the font name and font size in pts.
White number box
If the background is dark or very irregular you probably want to create a white box within which the counter is printed. Take this into account when setting the values for positioning the counter and add another 2 mm.
Second number
If you set this to yes you will get another field set for creating a second counter. This is useful if you want to create voucher check books or entry tickets were one part of the ticket can be torn of and collected for controlling who has entered.